
Key Takeaways
RV delamination happens when the outer layer of a vehicle’s sidewall detaches from its substrate, often due to moisture intrusion or prolonged UV exposure.
Look out for early signs like visible blisters or bubbles on the exterior, soft spots upon touch, and the separation of interior panels.
Experts recommend conducting regular inspections at least twice a year, focusing on areas like sealants, vents, and windows-especially those prone to moisture build-up.
Repairing RV delamination requires assessing the damage, cleaning the surfaces, applying high-quality adhesive, and maintaining pressure during the curing process for a robust bond.
To prevent delamination, regular cleaning, upkeep of sealants, and seasonal maintenance suited to winter or summer conditions are essential.
In cases of significant damage or when structural integrity is at risk, seeking professional repair services is advisable rather than trying DIY solutions.
When choosing a repair shop, it’s crucial to select one with a solid reputation for specialized RV repairs and to check customer reviews for insights into their service quality.
Understanding RV Delamination: Causes and Signs to Watch For
What Exactly Causes RV Delamination?
RV delamination often stems from the outer layer of the vehicle’s sidewall separating from its underlying substrate, which can jeopardize structural integrity. This issue typically arises due to several factors. Among these, moisture intrusion stands out. Faulty seals, inadequate drainage, or simply the passage of time can lead to water seeping into vulnerable areas, creating an ideal environment for mold and bacteria, which cause layers to separate.
Ultraviolet (UV) radiation’s impact is another common cause. Prolonged sun exposure can degrade the materials that hold the RV together, causing structural failure. Additionally, using low-quality bonding materials can lead to premature failure, making it clear that subpar products are a recipe for future problems.
Recognizing Early Signs of Delamination
Catching the early symptoms can prevent RV owners from facing costly repairs later. Signs like bubbles, blisters, or a wavy texture on the exterior indicate moisture intrusion. It’s not unusual for owners to feel soft spots or a strange spongy sensation when leaning against certain areas. Ignoring these indicators could result in far more severe damage down the line.
- Visible bubbles or blisters
- Soft spots when touched
- Separation of interior panels
Remaining vigilant about these signs is essential. Early detection often distinguishes a straightforward fix from a complicated repair job.
The Importance of Regular Inspections
Regular inspections enable RV owners to spot potential issues before they escalate into bigger problems. Experts typically recommend doing thorough checks at least twice a year. A strategic approach aims to identify vulnerabilities early. During these inspections, attention should be given to sealants, vents, windows, as well as the RV’s roof. Wheel wells and plumbing areas should also be on the radar, as moisture can easily go unnoticed there.
- Look for cracks or gaps in sealants.
- Inspect the roof for signs of wear or cracking.
- Examine interior walls for soft spots or discoloration.
Incorporating inspections into the RV maintenance routine enhances the chances of avoiding significant delamination issues.
Step-by-Step Guide to Repairing RV Delamination
Gathering the Right Tools and Materials
Before starting repairs, gathering all necessary tools is crucial. This project usually requires specific materials: high-quality adhesive, putty knives, sandpaper, and a utility knife. However, it’s important to note that this isn’t a generic task. The specific items needed can vary depending on the extent of damage and the materials utilized in the RV’s construction.
- High-quality adhesive (preferably waterproof)
- Putty knife for applying adhesive
- Utility knife for trimming damaged sections
- Sandpaper for smoothing surfaces
With the right tools gathered, the repair process can unfold smoothly. Thoughtful planning before embarking on repair rv delamination can aid in effective execution.
The Repair Process: From Assessment to Execution
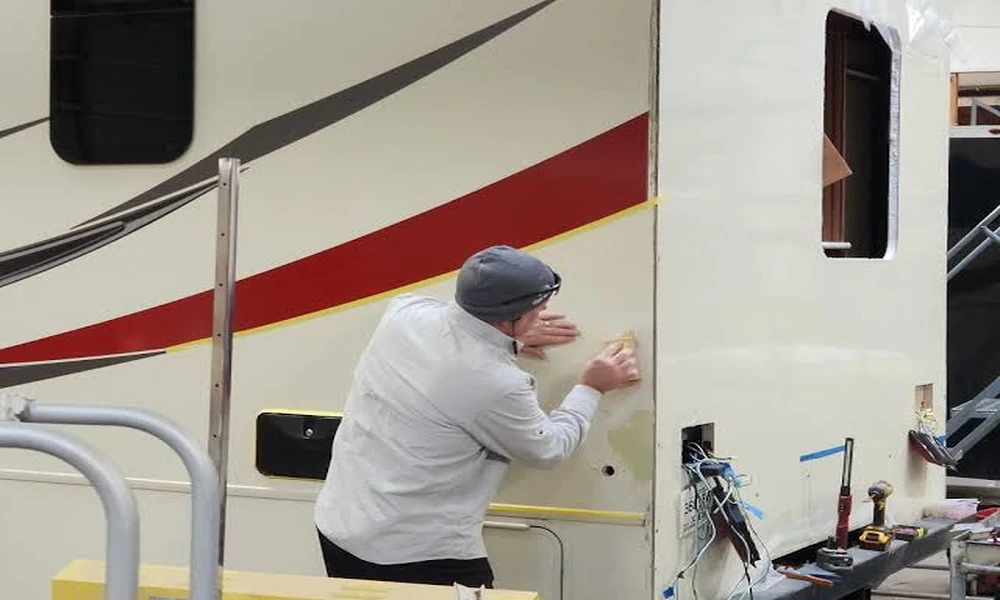
Once equipped, the first step is to closely assess the damage. Start by carefully peeling back affected areas. A utility knife can help trim away any warped or detached layers. Though the task can be tedious, it’s a vital step. After clearing the damaged sections, cleaning the surfaces takes priority. Ensuring cleanliness is key, as dirt, debris, or leftover adhesive can hinder a secure bond.
After cleaning, it’s time to apply adhesive generously and evenly. Coverage is crucial; any gaps might lead to future troubles. Press the layers back together, ensuring to use a putty knife for eliminating air bubbles and securing maximum adhesion.
Ensuring a Secure Bond: Techniques for Success
Maintaining pressure on the repair is essential for achieving a lasting fix. Professionals often suggest using clamps or weights during the curing period. Adhering to the adhesive manufacturer’s instructions regarding curing time is also important, as this can differ widely.
“Patience in allowing adhesives to cure leads to long-lasting repairs.”
After curing, checking the repairs is a good idea to confirm everything is securely bonded. At this stage, inspecting for any remaining soft spots or loose areas is advisable. Quality work now will ensure more enjoyable journeys in the future.
Preventing Future Delamination: Proactive Strategies
Regular Maintenance Best Practices
Maintaining an RV involves more than just responding to problems. It requires ongoing effort. To start, routine cleanings should be on the agenda. Ignoring dirt and grime can accelerate material deterioration. Regularly clearing debris from the roof and washing the exterior can stop minor issues from transforming into major ones.
- Wash the exterior frequently to remove buildup.
- Inspect and promptly replace worn sealants.
- Check the roof for damages routinely.
A little proactive maintenance can significantly help keep RV delamination at bay.
Importance of Quality Sealants and Coatings
High-quality sealants are vital for protection against moisture intrusion. Investing in top-tier products is crucial. While it might be tempting to choose cheaper options, doing so often leads to regret. Sealants should be UV resistant and specifically designed for RV applications, ensuring they can withstand the elements effectively.
Seasonal Care Tips for RV Owners
Every season presents unique challenges. During winter, proper winterization is key-draining all water systems and using antifreeze can prevent pipe ruptures. In summer, special attention should be given to UV protection, which may involve reapplying sealants or protective waxes.
- Perform winterization before temperatures drop to freezing.
- Inspect sealants after summer for UV damage.
- Store the RV in shaded areas to minimize sun exposure.
Seasonal care isn’t just about maintaining aesthetics; it’s about protecting the structural integrity of the RV. This dedication pays dividends during those lengthy trips.
When to Seek Professional Help for Delamination Repair
Recognizing the Limits of DIY Repairs
While many repairs can be tackled by determined RV owners, certain situations call for professional assistance. If extensive areas are affected or structural integrity seems compromised, consulting an expert is the best course of action. Ignoring the problem might create further complications in the future.
Additionally, any areas involving electrical components should raise red flags. Professional handling is crucial here to avoid even bigger issues later on. Sometimes, opting for expert assistance right away is smarter than risking a DIY disaster.
Choosing the Right Repair Shop: What to Look For
When selecting a repair shop, evaluating their reputation is key. Reading reviews and searching for specialized services is advisable. Shops focusing specifically on RVs, like Coach Specialists of Texas, tend to possess better insights and specialized tools for RV repair. Inquiring about their experience with delamination repairs can also play a significant role in the outcome.
- Confirm their specialization in RV repairs.
- Review customer feedback and testimonials.
- Ask about warranties and service guarantees.
Understanding Repair Costs and Expectations
Repair costs can fluctuate widely depending on the extent and nature of the damage. Obtaining a clear estimate upfront is crucial. Vague quotes should be avoided; instead, it’s important to delve into the details. Understanding the cost breakdown helps align expectations with reality.
Informed and proactive approaches lead to healthier RV ownership. Clients often find peace of mind in knowing their vehicle is well cared for. Whether they opt for independent repairs or professional assistance, knowledge equips them better in tackling RV delamination.
FAQ
What are the long-term consequences of untreated RV delamination?
Untreated RV delamination can result in substantial structural damage that compromises safety and performance. Moisture intrusion risks mold growth and undermines stability, making eventual repairs more labor-intensive and costly.
How can temperature fluctuations affect RV delamination?
Temperature changes can worsen delamination issues by causing materials to expand and contract. This movement weakens adhesive bonds, making moisture intrusion more likely and accelerating overall deterioration.
Are there specific brands that are better for preventive sealants?
Several brands stand out for their high-quality sealants designed for RVs. Professionals frequently recommend products from companies like Dicor, 3M, and Geocel for their UV-resistant and waterproof solutions that effectively withstand various conditions.
How often should RV owners perform preventive maintenance?
Typically, professionals recommend conducting preventive maintenance checks at least twice a year. However, aligning these checks with seasonal changes-before winter and after summer-can further enhance preventive measures against delamination.
Is there a specific time frame for DIY repairs?
The duration for DIY repairs can vary significantly based on the extent of the damage. Smaller fixes might be completed in a few hours, while more extensive delamination repairs could take several days due to the need for thorough inspection, adhesive curing, and cleanup.
What qualifications should a professional repair technician have?
When seeking a technician for RV delamination repairs, it’s important to look for certifications specific to RV maintenance. Factors like experience level, specialized training in RV repairs, and familiarity with the various materials used in RV construction are crucial considerations.
How does moisture detection technology fit into RV maintenance?
Moisture detection technology is a game-changer for RV owners. Devices such as moisture meters assist in identifying hidden leaks and vulnerabilities, enabling quicker interventions before serious delamination issues arise.
What is the typical warranty period for professional RV repairs?
Warranties for RV repairs can range from a few months to several years, depending on the repair shop and the scope of work done. It’s advisable for clients to inquire about warranty details during the selection process to ensure adequate protection and support after repairs.
