
Key Takeaways:
- Assess the damage to your RV after a collision to determine the necessary repairs.
- Different types of collisions can result in different damages to your RV.
- Inspect your RV for signs of damage, both externally and internally.
- Consult professionals for a thorough assessment of the damage.
- Choose between DIY repairs or professional help based on your skills, complexity of repairs, and budget.
- Consider the cost-effectiveness of each option and potential long-term savings.
- Gather the necessary tools and materials before starting the repairs.
- Create a safe and well-prepared work area for the restoration process.
- Follow repair techniques such as panel removal, window repair/replacement, dent and scratch fixing, and repainting.
- Check and fix electrical and plumbing systems after a collision.
- Renovate the interior of your RV to enhance its appearance and comfort.
- Implement preventive maintenance practices to protect your RV from future damage.
1. Assessing the Damage: Identifying the Extent of Collision
When a collision occurs, whether it’s a small fender bender or a more significant accident, the first step to restoring your RV is assessing the damage. This crucial step allows you to identify the extent of the collision and determine the necessary repairs.
Understanding the Impact: Different Types of Collisions
Collisions can occur in various ways, and each type of collision can result in different damages to your RV. Some common types of collisions include rear-end collisions, side-impact collisions, and rollovers. Rear-end collisions often cause damage to the rear bumper and taillights, while side-impact collisions can result in damage to the side panels and windows. Rollovers are particularly severe and can cause extensive damage to the entire RV structure.
Symptoms of Damage: Signs to Look Out For
After a collision, it’s essential to inspect your RV for any signs of damage. These signs can include dented or scratched exterior panels, broken windows, misaligned doors, and even internal damage such as issues with the electrical or plumbing systems. It’s crucial not to overlook any potential damage, as even minor issues can lead to more significant problems in the future if left unaddressed.
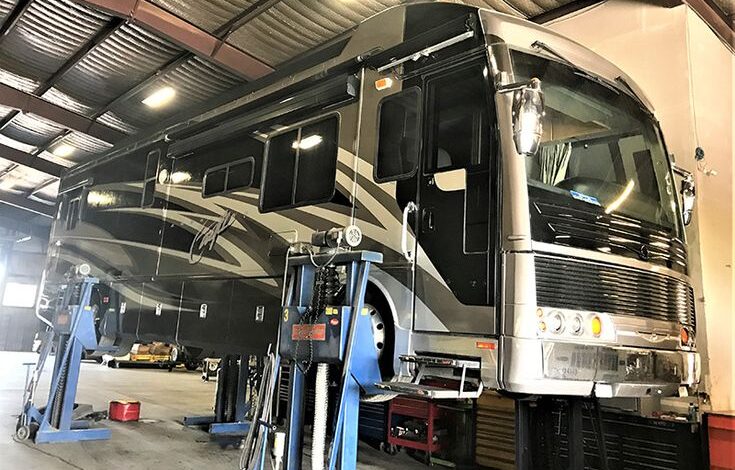
Calling the Experts: Consulting Professionals for an Accurate Assessment
While you can initially assess the damage yourself, it’s highly recommended to consult professionals for a thorough and accurate assessment. Collision repair experts have the knowledge and experience to identify hidden damages that may not be immediately noticeable. They will provide you with a detailed report outlining all the repairs required to restore your RV to its pre-collision condition.
2. DIY or Professional Help: Choosing the Right Approach
Once you have assessed the damage, the next step is determining whether to tackle the repairs yourself or seek professional help. This decision will depend on various factors, including your skill level, the complexity of the repairs, and your budget.
Assessing Your Skills: Determining if DIY Repair is Feasible
DIY repairs can be a cost-effective option if you have the necessary skills and knowledge. However, it’s crucial to evaluate your abilities realistically. Consider whether you have experience in RV repairs, access to the required tools, and the time and patience to dedicate to the project. Keep in mind that improper repairs can lead to further damage and safety hazards.
The Pros and Cons: Weighing the Benefits of Professional Repair
Professional repair services offer several advantages that DIY repairs may not provide. Expert technicians have extensive training and experience to handle various RV collision repair. They have access to specialized tools and equipment, ensuring accurate and high-quality repairs. Professional services also typically come with warranties, providing peace of mind knowing that the work is guaranteed.
Considering the Budget: Calculating the Cost-Effectiveness of Each Option
When deciding between DIY or professional repairs, it’s crucial to consider your budget. DIY repairs may seem more cost-effective initially, but keep in mind that you will need to invest in tools, materials, and possibly spend more time on the project. On the other hand, professional repairs may have a higher upfront cost, but they can potentially save you money in the long run by preventing further damage or incorrect repairs.
3. Tackling the Repairs: Step-by-Step Guide to Restoring Your RV
If you choose to tackle the repairs yourself, it’s essential to have a step-by-step guide to ensure a successful restoration of your RV. This guide will help you understand the necessary tools, materials, and techniques required for each repair.
Gearing Up: Gathering the Necessary Tools and Materials
Before you start the repairs, gather all the necessary tools and materials. These can vary depending on the specific repairs required, but some common items include a hammer, a drill, a putty knife, sandpaper, fiberglass repair kits, automotive paint, and safety equipment such as gloves and goggles. It’s crucial to have everything you need on hand to avoid delays during the repair process.
Getting Started: Preparing the Work Area and Ensuring Safety
Prior to beginning any repairs, it’s important to prepare your work area properly. Choose a well-ventilated space with enough room to maneuver around the RV. Protect the surrounding area with drop cloths or plastic sheets to prevent any accidental damage or spills. Additionally, ensure you wear appropriate safety gear, such as safety goggles and gloves, to protect yourself during the repair process.
The Restoration Process: A Detailed Walkthrough of Repair Techniques
Now that you have your tools ready and your work area prepared, it’s time to start restoring your RV. The restoration process will vary depending on the specific damages your RV has suffered. However, some common repair techniques include removing damaged panels, repairing or replacing windows, fixing dents and scratches, and repainting the damaged areas. It’s crucial to follow manufacturer guidelines and instructions for any repair products or materials you use.
4. Beyond the Surface: Additional Considerations for RV Restoration
While repairing the exterior damage is essential, it’s equally important to consider the underlying systems and interior of your RV during the restoration process. Addressing these aspects will ensure the complete revival and longevity of your RV.
Electrical and Plumbing: Checking and Fixing Underlying Systems
After a collision, it’s vital to assess the integrity of your RV’s electrical and plumbing systems. Check all the wiring and connections for any damage and ensure they are functioning correctly. If you notice any issues, such as faulty switches or water leaks, it’s crucial to address them promptly to prevent further damage and potential safety hazards.
Interior Makeover: Tips for Renovating the Interior of Your RV
As you restore the exterior of your RV, don’t forget about the interior. Renovating the interior can breathe new life into your RV and enhance your overall RVing experience. Consider updating the upholstery, flooring, and cabinetry to create a fresh and modern look. Additionally, installing energy-efficient appliances and improving the insulation can make your RV more comfortable and cost-effective.
Preventive Maintenance: Protecting Your RV from Future Damage
Once you have completed the restoration process, it’s crucial to implement preventive maintenance practices to protect your RV from future damage. Regularly inspect your RV for any signs of wear and tear and address them promptly. Additionally, practice safe driving habits, such as maintaining proper tire pressure and avoiding overloading your RV, to minimize the risk of potential collisions.
By following these comprehensive steps and considering the additional aspects of RV restoration, you can successfully revive and restore your RV after a collision. Whether you choose to tackle the repairs yourself or seek professional help, remember that thoroughness is key to ensure the longevity and safety of your beloved recreational vehicle.
FAQ
Question: What should I do after a collision to restore my RV? – After a collision, the first step is to assess the damage to determine the necessary repairs. This involves inspecting both the exterior and interior of the RV for signs of damage.
Question: What are the different types of collisions and their potential damages? – Collisions can occur in various ways, such as rear-end collisions, side-impact collisions, and rollovers. Each type of collision can result in different damages to your RV. Rear-end collisions often cause damage to the rear bumper and taillights, while side-impact collisions can result in damage to the side panels and windows. Rollovers are particularly severe and can cause extensive damage to the entire RV structure.
Question: Should I consult professionals for an assessment of the damage? – While you can initially assess the damage yourself, it is highly recommended to consult professionals for a thorough and accurate assessment. Collision repair experts have the knowledge and experience to identify hidden damages that may not be immediately noticeable.
Question: Should I attempt DIY repairs or seek professional help? – The decision to tackle the repairs yourself or seek professional help depends on factors such as your skill level, the complexity of the repairs, and your budget. DIY repairs can be cost-effective if you have the necessary skills and tools, but professional repairs offer advantages such as expertise, specialized equipment, and warranties.
Question: What tools and materials do I need for DIY repairs? – Some common tools and materials for DIY repairs include a hammer, drill, putty knife, sandpaper, fiberglass repair kits, automotive paint, and safety equipment such as gloves and goggles. The specific tools and materials required may vary based on the repairs needed.
Question: How do I restore the exterior of my RV? – The restoration process for the exterior of your RV may include techniques such as panel removal, window repair or replacement, dent and scratch fixing, and repainting. It is important to follow manufacturer guidelines and instructions for any repair products or materials used.
Question: Should I check the electrical and plumbing systems after a collision? – Yes, it is vital to check the integrity of your RV’s electrical and plumbing systems after a collision. Inspect the wiring and connections for any damage and ensure they are functioning correctly. Promptly address any issues found to prevent further damage and potential safety hazards.
Question: How can I renovate the interior of my RV? – Renovating the interior of your RV can enhance its appearance and comfort. Consider updating the upholstery, flooring, and cabinetry. Installing energy-efficient appliances and improving insulation can also make your RV more comfortable and cost-effective.