
Key Takeaways
- RV delamination occurs when moisture penetrates the exterior layers of an RV and weakens the adhesive bond between materials, potentially affecting both appearance and structural integrity.
- Common causes of RV delamination include water intrusion, damaged seals, prolonged exposure to harsh weather, poor maintenance, manufacturing defects, and accidental impact.
- Early detection is essential. Bubbles, blisters, soft spots, cracking, peeling, and musty odors can indicate that moisture has entered the RV structure.
- Professionals use visual inspections, moisture meters, thermal imaging, and other diagnostic methods to determine the location and severity of delamination.
- Minor delamination may be addressed by cleaning the affected area, applying the appropriate adhesive, re-bonding the laminate, clamping the surface, and refinishing it after curing.
- Severe delamination often requires professional repair, including removing damaged sections, replacing compromised materials, addressing the source of moisture, and resealing the affected area.
- Proper preparation and high-quality materials are essential for achieving durable repair results and preventing the problem from returning.
- Regular inspections, seal maintenance, proper ventilation, and covered storage can help protect repaired areas and extend the life of an RV.
Understanding RV Delamination and What Causes It
How Moisture Damages an RV’s Exterior
Moisture is one of the most common causes of RV delamination. When water enters through damaged seals, windows, roof seams, or small cracks, it can penetrate the layers of the RV’s exterior. Over time, this moisture weakens the adhesive that bonds the exterior laminate to the underlying structure.
The problem may begin with a small bubble or slight separation that appears mostly cosmetic. However, continued moisture exposure can cause the affected area to expand. In severe cases, the underlying wood or composite materials may begin to deteriorate, creating structural concerns.
For RV owners looking to repair rv delamination, identifying and eliminating the source of moisture should always be a priority. Repairing the visible damage without fixing the leak or failed seal can result in recurring problems.
Common Causes of RV Delamination
Several factors can contribute to delamination. Understanding these causes can help RV owners take preventive action and identify problems before they become extensive.
Common causes include:
- Water intrusion: Failed seals around windows, doors, roof components, and exterior fixtures can allow moisture to enter.
- Weather exposure: Long-term exposure to rain, sunlight, freezing temperatures, and temperature fluctuations can weaken exterior materials.
- Poor maintenance: Neglected seals and small cracks can gradually develop into larger sources of water intrusion.
- Manufacturing defects: In some cases, inadequate bonding or material issues during construction may contribute to premature delamination.
- Accidental damage: Impacts and exterior damage can create openings that allow moisture to reach the interior layers.
The most effective repair strategy begins by determining why delamination occurred in the first place. Addressing the root cause is essential for achieving lasting results.
How to Identify RV Delamination Before It Gets Worse
Professional Diagnostic Techniques
Early detection can make RV delamination repairs significantly easier and less expensive. A professional inspection typically begins with a detailed visual assessment of the exterior.
Experienced technicians may also use specialized tools to locate moisture and determine the extent of hidden damage.
Common diagnostic methods include:
- Visual inspections: Professionals look for bubbles, blisters, waves, cracks, and areas where the exterior surface has separated.
- Moisture meters: These tools can help identify elevated moisture levels behind exterior materials.
- Thermal imaging: Differences in temperature patterns may help identify areas affected by moisture or structural changes.
- Physical inspection: Technicians may carefully check suspicious areas for softness, movement, or changes in surface firmness.
Using the right diagnostic approach allows professionals to determine whether the issue is superficial or connected to deeper structural damage.
Warning Signs Every RV Owner Should Watch For
RV owners should regularly inspect their vehicles for signs that could indicate developing delamination.
Important warning signs include:
- Bubbles or blisters appearing on the exterior walls
- Visible waves or ripples in the sidewall
- Cracked, peeling, or separating exterior finishes
- Soft areas that feel different when touched
- Musty odors that may indicate trapped moisture
- Water stains or evidence of previous leaks
- Loose seals around windows, doors, and exterior fixtures
The sooner these signs are investigated, the greater the chance of preventing the damage from spreading. Ignoring a small area of delamination can allow moisture to continue damaging the underlying structure.
Expert Techniques for Repairing Minor RV Delamination
Assess the Extent of the Damage
Before beginning any repair, the affected area should be carefully inspected. The goal is to determine how far the laminate has separated and whether the underlying materials remain structurally sound.
If the damage is limited and the underlying structure is still in good condition, a localized repair may be possible. However, widespread delamination or significant structural deterioration may require professional restoration.
Identify and Fix the Source of Moisture
Repairing the laminate without addressing the original water intrusion is unlikely to provide lasting results. Professionals should inspect nearby windows, doors, roof seams, vents, and other possible entry points.
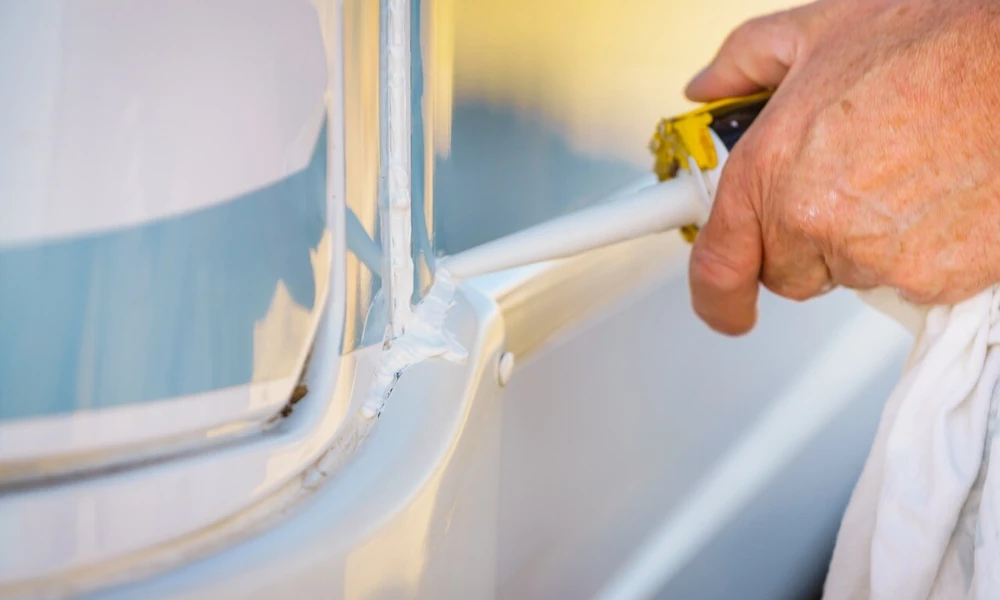
Any damaged or deteriorated seal should be repaired or replaced before the delaminated surface is restored.
Prepare the Affected Surface
The damaged area must be properly cleaned and prepared before new adhesive is introduced. Dirt, debris, moisture, and damaged materials should be removed as appropriate.
Proper preparation helps ensure that the new adhesive can form a strong bond with the surrounding materials.
Re-Bond the Separated Layers
For suitable minor repairs, an appropriate adhesive may be applied to reconnect the separated laminate with the underlying structure. The adhesive selected should be compatible with the materials being repaired and suitable for the environmental conditions the RV will experience.
This stage requires precision. Applying too little adhesive may result in an incomplete bond, while improper application can create additional surface problems.
Apply Even Pressure During Curing
Clamps, boards, or other suitable methods may be used to hold the repaired area securely while the adhesive cures. Maintaining consistent pressure helps create a stronger and more uniform bond.
The adhesive manufacturer’s recommended curing time should always be followed before removing the supports or moving on to finishing work.
Refinish and Protect the Surface
After the repair has fully cured, the area may need to be smoothed, refinished, or resealed to restore its appearance and protect it from future moisture intrusion.
A quality finish should blend with the surrounding surface while creating an additional barrier against environmental exposure.
Advanced Techniques for Severe RV Delamination
Removing Heavily Damaged Materials
Severe delamination may extend beyond the exterior laminate and affect the structural materials beneath it. In these situations, simply injecting adhesive may not be sufficient.
Professionals may need to carefully remove damaged sections to determine the full extent of the deterioration. Any compromised structural materials must be properly addressed before the exterior is restored.
Replacing Damaged Structural Components
If moisture has caused wood rot or significant deterioration, damaged materials may need to be removed and replaced. The replacement materials should be appropriate for RV construction and installed according to professional repair practices.
The objective is not only to restore the appearance of the exterior but also to rebuild the affected section so it can withstand normal use and environmental exposure.
Sealing the Repaired Area Against Future Moisture
Once the damaged materials have been repaired or replaced, preventing future water intrusion becomes critical. Windows, doors, roof seams, vents, and exterior fixtures should be inspected and properly sealed.
A lasting repair depends on eliminating the conditions that caused the delamination in the first place. Without effective moisture prevention, even a professionally repaired area may eventually experience similar problems.
How to Achieve Long-Lasting RV Delamination Repairs
Use the Right Materials and Repair Methods
The quality of the materials used during a repair can have a major impact on durability. Adhesives, sealants, replacement materials, and finishing products should be selected based on the RV’s construction and the specific repair requirements.
Using incompatible materials or taking shortcuts during the repair process may lead to premature failure.
Know When to Hire a Professional
Minor cosmetic issues may sometimes be manageable by experienced RV owners. However, extensive delamination can involve hidden moisture damage and compromised structural components.
Professional assistance is recommended when:
- The affected area is large or rapidly expanding.
- The underlying structure feels soft or weak.
- There are signs of wood rot or mold.
- Water intrusion continues despite previous repairs.
- Multiple areas of the RV show signs of delamination.
- The repair requires extensive removal or replacement of structural materials.
A professional assessment can help prevent an owner from spending money on a temporary repair when a more comprehensive restoration is needed.
Preventing RV Delamination After Repairs
Inspect Seals and Exterior Surfaces Regularly
Routine inspections are one of the best ways to protect an RV after repairs. Owners should regularly examine the roof, windows, doors, seams, and exterior fixtures for cracks, gaps, or deteriorated sealant.
Finding and repairing small openings early can prevent water from reaching the RV’s interior layers.
Maintain Proper Ventilation
Moisture can also accumulate inside an RV due to cooking, showering, condensation, and everyday use. Proper ventilation helps reduce indoor humidity and limits the amount of moisture that can contribute to long-term damage.
Using ventilation systems and allowing damp areas to dry properly can support better overall moisture management.
Store the RV Properly
When possible, storing an RV under a suitable cover or in a protected location can reduce exposure to rain, direct sunlight, and extreme weather.
Proper storage does not eliminate the need for maintenance, but it can reduce environmental stress on exterior materials and seals.
Schedule Routine Professional Inspections
Periodic professional inspections can identify developing problems that may not be obvious during a basic visual check. This is especially important for older RVs or vehicles that have experienced previous water intrusion.
Preventive maintenance is generally easier than dealing with widespread structural damage after delamination has progressed.
FAQ
What is RV delamination?
RV delamination occurs when the exterior layers of an RV separate because the adhesive bond between them has weakened. Moisture intrusion is one of the most common contributing factors, although weather exposure, manufacturing issues, and physical damage can also play a role.
What are the most common signs of RV delamination?
Common signs include bubbles, blisters, ripples, soft spots, cracking, peeling surfaces, and visible separation of exterior materials. Musty odors and evidence of water intrusion may also indicate underlying moisture damage.
Can minor RV delamination be repaired?
In some cases, minor delamination can be repaired if the underlying structure remains sound. The process may involve fixing the source of moisture, preparing the affected area, applying a compatible adhesive, clamping the surface, and refinishing it after the adhesive cures.
Can severe RV delamination be repaired?
Yes, severe delamination can often be repaired, but the process is typically more involved. Extensive repairs may require removing damaged sections, replacing deteriorated structural materials, and resealing the area to prevent future water intrusion.
How can RV owners prevent delamination from returning?
Regular inspections are essential. Owners should check exterior seals, windows, doors, roof seams, and other potential sources of water intrusion. Proper storage, ventilation, and timely maintenance can also help reduce the risk of recurring delamination.
Is RV delamination always caused by water?
Moisture is a major cause, but it is not the only factor. Manufacturing defects, prolonged environmental exposure, poor maintenance, and accidental exterior damage can also contribute to delamination.
When should an RV owner contact a professional?
Professional assistance is recommended when delamination covers a large area, the underlying structure feels soft, there are signs of rot, or previous repairs have failed. Professionals can use specialized diagnostic methods to determine the extent of hidden damage.
How often should an RV be inspected for signs of delamination?
RV owners should perform visual inspections regularly and schedule more thorough checks at least twice a year or before and after extended travel. Older RVs and vehicles with a history of leaks may benefit from more frequent inspections.
